Tuesday, February 28, 2017

Travel Far

Welcome to February's Artist Team Blog Hop brought to you by Club Scrap. Each month the team presents a themed challenge or technique. The  purpose of the blog hop is to demonstrate the beauty of paper crafts.

If you just happened on the blog hop today because you're a regular reader of my blog, and you'd like to view the entire hop, you can start back at Club Scrap.  If you're already hopping and linked to me from Donna's Blog, you're in the right spot.

Each member of the team is pulling inspiration from Alphabet Stencils. They're available in both lower case and upper case. I was first introduced to these stencils at the October Retreat.  We received the lower case set as a free goodie.
 
When my husband and I were traveling through Canada and down the East Coast we stopped in this little spice shop in Portland, Maine. We fell in love with their hand-made sign that read:  Travel Far. Eat Well. Live Long. That is totally our motto.  It just so happens that were on a Foodie Tour of Portland. Maine.  We love to travel and try the foods of the region.  I was unable to find one on-line that I like and decided to make my own with my stencils.
 
I painted this $7.00 thrift store find with Chalk Paint. It's a huge wooden tag by Danielson Designs.
 

After several layers of paint I marked off the top and bottom of the tag using 1" painter's tape.
This will be my guides for the top of the letters along the top and bottom of the letters along the bottom.

Being the "attention to detail" person that I am, I marked the center and stenciled my letters in pencil out from the center.
Thank goodness for the penciling first. I misspelled "Travel".
Once I had the top and bottom lines done I measured, centered and marked another 1" line for the bottom of the middle line.
I'm going to stop here and apologize for the terrible photos and for not photographing the key important step. 
I was so excited that I didn't screw up the stenciling that I forgot to take a photo :(

Next step would have shown you to take the stencil and retrace the letters using a Sharpie. 
Yep...a Sharpie. 
I suck at painting and there was no way this would have turned out otherwise.

 I added handmade no-sew burlap rosettes for added interest.
 
Thanks for joining us today. 
Please continue on to see what the very talented Tina has created for you.


Monday, February 27, 2017

Tall & Skinny

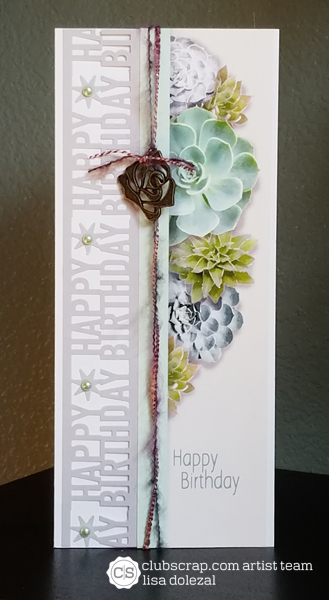
Tall and Skinny cards are my favorite!  So you can imagine my glee when the Succulent's Greetings to Go had these in them. I'm not sure why they don't get more love.  It's actually hard to find sketches for these. They are a perfect canvas for those cut apart border strips that don't get used on layout pages.

Club Scrap papers, tags and fibers. Martha Stewart punch. Queen & Co. pearls.
 
Club Scrap papers, tags and fibers. Martha Stewart punch. Prima flowers. Queen & Co. pearls.
 
Club Scrap papers and stamps. Hampton Arts border. Gelli print.
 
Club Scrap papers, stamp, tag and fiber. Queen & Co. pearls.


Friday, February 24, 2017

It's Your Fault with Folds

I thought I'd share more on this month's technique challenge which is to use unusual folds in your projects.  Once again I didn't venture too far from original and used the Color Me Happy Greetings to Go.  I can't even take credit for the designs.  Seriously...this is straight from the directions.  I added some bling, Stickles and embossing to make them my own :) Super easy. Super quick!


Here's more inspiration for some fun folds:


Thursday, February 23, 2017

Get the Picture?

I thought I'd share more gelli prints. 
I just love these art panels.
No two are the same and they're quite fun to create. 
I just keep layering colors and stencils until I get an image I like.
 
Club Scrap papers, doily, flower, stencils and stamp. Mark Richards Crystal squares. Hampton Arts border.
 
Club Scrap papers, stencils, tags, ribbon and enamel dot. EK Success punches.
 
Club Scrap papers, stencils, enamel dots and stamps. Hampton Arts border.


Wednesday, February 22, 2017

Succulents Creative Assignment

Welcome to the Succulents Blog Hop brought to you by Club Scrap.  Each month the talented Club Scrap owner, employees and members present a project, card or layout using the monthly featured collection. The  purpose of the blog hop is to demonstrate the beauty of paper crafts.

If you just happened on the blog hop today because you're a regular reader of my blog, and you'd like to view the entire hop, you can start back at Club Scrap. If you're already hopping and linked to me from Tina's Blog, you're in the right spot.

While rummaging through my project bin I came across these lonely assignment pages that I purchased at Retreat several years ago.  It's time to use those babies up!  My old Cyprus Creative Assignment project (2008) was faded from the sun and almost empty.  It definitely was well loved and well used.
Start by gathering the loose inside pages. Carefully align all the edges and bind the pages with clips at the left and right edges. 
Apply a thick coat of Bookbinding Glue to the top edge of the stack. Let dry.
  
Apply glue to one 5.25 x 6.75 piece of Book Board and place on 6.75 x 10 outside cover. Add a .5 x 5.25 spine .25" from the back cover. Place your front 5.25x 6.75 book board piece .25" from the spine and draw a line from top to bottom where the paper edge is.  Apply glue in this area only and place on paper. Next take your front cover and glue to front book board lining up the seams.
Wrap edges remembering to miter your corners. 
Inside

 Outside
 
Cover inside back right panel with 5 x 8 cover paper. Center paper 1/8 from top, bottom and right corner. Don't forget to work paper into the hinge gutters. To create a pocket, score a 7 x 7.25 piece of cardstock 2" up from the bottom and .50" from left and right sides. Trim off the 5.25 x .50 tabs. Fold pocket up and glue the two bottom flaps to back side of pocket page. Adhere pocket page to left side of exposed board.
Fold a 2.50 x 3.25 piece of cardstock horizontally around a pencil forming a snug fit. Glue pencil holder to top of the back side of paper pad edges. Cover back of paper pad with bookbinding glue and center onto back of inside cover and adhere. 
Apply a patterned ribbon to the cover seam using bookbinding glue. Wrap the ribbon edges down into the pocket for to give this a fun and unique look. 

Punch a hole about .50" down from top edge. Set an eyelet and attach a chain.  Here I added lots of different ribbons and fibers to the chain.  Decorate front as desired.

Thank you for stopping by! Please continue on to see what the amazing Donna has created for you.

Tuesday, February 21, 2017

Earth's Best

I seriously went through my stash of borders and cutaparts this last weekend.  The weather was rainy and chilly.  A perfect crafting weekend with a mimosa here and there :-)  My goal is to use up all of my Greetings to Go collections and all those border strips I have laying around. I have to admit.  I made a pretty good dent.  I can't wait to share all of the creations with you.
 
This card was created for the Sunday Stamps Sketch #146.  I filled in the coffee cup with Nuvo drops to add dimension.

Club Scrap papers, tag, border strip and ribbon. Nuvo crystal drops. Queen & Co. pearls. Cuttlebug embossing folder.

Monday, February 20, 2017

Fun and Fancy Folds

This month's technique challenge is to use some fun and fancy folds in your projects.  I have to be honest...I didn't get real creative in coming up with a fun fold.  I used the card designs in the Succulent's Greetings to Go collection. I simply followed the instructions.  I couldn't help it.  They were sitting out on my desk when the challenge was presented. Think smarter not harder ;-)
 
Score and fold the 4x8" card base horizontally at 5”. Score the 2x8” cardstock
horizontally at 2⅛ and 6⅜” and fold the flaps inward. Line up the  long scored strip to the bottom edge of the card base and adhere. Use a panel on the inside to hide the seems. Fold all flaps inward.
 
Club Scrap stencils and paper. Gelli prints. Martha Stewart bow and punch. Queen & Co. pearls.
 

Club Scrap papers, ribbon and tags. Darice embossing folder.
 

Club Scrap papers and tag. Nuvo drops.
 

Club Scrap papers, tag and stamps. Cuttlebug embossing folder. Martha Stewart punch. 
 
Now it’s YOUR turn! Be sure to share a photo of your finished project and link it up at the bottom of the Club Scrap post  for a chance to win a Club Scrap gift certificate.

Friday, February 17, 2017

Queen of Diamonds

I cannot stop raving about my Idea Decks from Club Scrap!  These gems are paramount in my crafting process. It doesn't matter if I'm creating layouts or cards, they take all the guess work out of cutting and design. Really, the hardest part for creating these cards below was deciding what papers to use!
 
This month's Idea Deck Challenge is to use the Queen of Diamonds from any deck. I believe these are from Idea Deck #5. The sketch creates 4 cards.  I used papers, ribbons and tags from Succulents. You may also notice that each card uses three tiny embellishments of pearls, Nuvo drops or gems. This weeks PSL (Pro Scrapbookers League) challenge is to use three of a kind on your layouts, cards or projects.


Of all five decks only one still remains for sale. Get it quick!


Thursday, February 16, 2017

Succulents Digital

Succulents are all the rage right now. Until this last two months, California had been in a drought and everyone was changing their landscape to succulents.  Sadly to say, I could probably not keep these alive if I was responsible for the gardening :)

I absolutely love the colors of this new Succulents digital collection by Club Scrap. When I got a sneak preview of this kit I snapped some quick photos of my mom's succulents she has planted in an old suitcase.  The whole grouping is just adorable! I never really paid attention to the beautiful pinks mixed in with the greens until I saw the prints for this kit.  I do love me so me pink!  This layout was created using the February sketch provided with the Succulents paper collection and entered into the Monthly Layout Challenge.
 
All digital products by Club Scrap.


Wednesday, February 15, 2017

Love One Another

Creative with Stamps is hosting a Valentine Challenge this month.  I thought this would be a perfect time to use a love quote from the "Written Hearts" stamp set created by my fellow Club Scrap Artist Team mate, Lilian.

Club Scrap papers, large flower stamps and dots. Sonshine Stamp Co. sentiment. American Crafts fiber. Sizzix heart dies.

Tuesday, February 14, 2017

From the Heart Part II

Happy Valentine's Day!
Here's the last of the From the Heart window cards. 
I am in love with the larger stamps from the Succulents collection and couldn't wait to use them. 


Club Scrap papers, stamps and dots. American Crafts ribbon.


Monday, February 13, 2017

Fusion Card Challenge


Early in the month I created gelli prints in bulk and thought I'd share the process again.  It's been awhile since I dusted off the gelli plates.  I love having a stash on hand for a backgrounds. These can take a card from drab to WOW instantly.
 
This first card was created for this week's Fusion Card Challenge.

Club Scrap paper and stencil. Dazzles gold stickers. Darice embossing folder. Spellbinders die sentiment. Elizabeth Craft Designs Circle die.
 
 
But I didn't stop there...Here's the process and more:
 
Add acrylic paint to your gelli plate with a brayer.  
 
I mixed colors to get my color choice.
 
Add a stencil on top of paint and gelli plate.
 
Add paper on top of stencil and rub backside of paper to get a good coverage.
Remove paper.
 
Pull stencil off gelli plate and add another panel to pick up the remaining paint.
Rub paper against gelli plate.
Repeat the process on the same panel until you like the results.
 
Here's a sampling of some of my prints.
 
Now what to do with those panels?  Keep your creations simple.
You've already done the hard part!