Sunday, January 31, 2016

Be Mine

I can't believe January is almost over!  I swear Christmas just ended.  

Today I'm playing in the Fusion Card Challenge using their sketch.


A couple weeks ago I created a whole bunch of background panels with my gelli plates. Time to put those to use! With this card I punched out flowers from a print and layered them, securing them with a brad. You gotta scrunch them up a bit to get the right dimension.

Club Scrap papers and stencils. 7Gypsies tag. Unknown brads. 


Saturday, January 30, 2016

The Places You've Seen

The best things in life are the people you love, the places you've seen and the memories you've made along the way. 
What a great quote!
A little digital page using Club Scrap Navigation embellishments over a photo of the Maine coast line.

Have a beautiful, memorable weekend!
 

Friday, January 29, 2016

Winning is Not Everything

Here's a layout using up the last bit of the Packer paper I bought several years ago. I saved every last scrap not knowing if I'd ever find that paper again. Which I haven't :(  

What a great time with friends! Our annual October tradition before attending the Club Scrap retreat is to visit Lambeau.  We were able to see the new renovations to the Atrium, the new  Packer Pro Shop and Hall of Fame. We did miss Curly's Pub but we could probably get used to the new 1919 restaurant.   This year we were lucky enough to catch a Packer game on Sunday.  For once, we didn't freeze our butts off.  Quite the opposite.  It was warmer in Wisconsin than California at the time!

Club Scrap paper and stamps. NFL paper and sticker. Karen Foster brads. 

Thursday, January 28, 2016

Wood U Be Mine?

I purchased some adorable wooden owls at Hobby Lobby thinking I'd do some Valentine's cards similar to one's I made last year. I came across Cupcake Inspirations Challenge for this week and just loved the color combinations!  Perfect for Valentine's Day!
 
 
I inked the wooden owl in gold ink and embossed with gold powder. Used the Sizzix wood embossing folder on the background paper and inked with gold ink. Heat set. Added a blush and cream feather and stamped images.


Wednesday, January 27, 2016

Celebrate Blog Hop

Welcome to the Club Scrap Celebrate Blog Hop! If you've arrived here from Anne Marie's blog, you're in the right spot. If you'd like to start from the beginning to see what Karen has created please return to Club Scrap


Celebrate is Club Scrap's 200th collection!  Still can't believe it, even after scrapping with this kit all month, it still astounds me that they came up with 200 different collections! Speaking of scrapping with this kit all month, I ran out of the printed papers before I created my pages for the Hop. Ok..I misspoke. I did have the silver glitter 12x12 paper...but I will NEVER cut into that paper.  I just like looking at it. So, I had to create my own background papers.  I've already done the spritzing, painting thing with the circle challenge and wanted something different. I had all these left over pieces from other projects and decided to thumb through my Assembly Line card decks looking for a background layout. I just cut down the scraps according to the sizes on the back. 

Deck 5

I wish I had taken a picture of the background pages so you could see how they came out.  Sorry. You'll notice the left side and bottom right side have some open space. I didn't like the unfinished look so I wanted to use ribbon.  Then my eye caught the name badges in the photos.  That couldn't have been more perfect! I will have to say, I did have a bit of chest pain when cutting the lanyard but kept telling myself that I would appreciate it more on the page than in my CS mementos box. 

Club Scrap papers, stamps, stars and clips and letters. Bella Blvd numbers.


Thank you for hopping by! Please continue on to see what Donna has created for you!

Tuesday, January 26, 2016

Paper Smooches Four Colors

I love me some shoes!  I spent about an hour last night searching the web for cute flats. Why do all the bloggers/ads have heels.  Some of us just aren't coordinated in heels (hence two simultaneous sprained ankles). Some girls wear steel-toed boots all week for work.  Anyways...back to my post...

I have some really cute shoe stamps that have been neglected.  When I won Paper Smooches sketch challenge back in October they gave me a $25 gift certificate to their store.  I bought wine stamps and shoe dies. Shocking, I know!  Well, I finally used them. I love this little easel die too.

January's challenge at Paper Smooches is to use 4 colors. Any four colors.  Well, I recently made a few background using gelli plates, stencils,  red, white and pink acrylic paint.  I'm hoping to get a few Valentine's Day cards done with these backgrounds too. 

Club Scrap papers and stencil. Paper Smooches dies, Rubbernecker and Art Impressions stamps. 


Monday, January 25, 2016

A Good Life

A good life is a collection of happy moments ~Dennis Waitley.  What a beautiful quote! Our recent exploration down the east coast of Canada was an amazing, happy trip for us. I've been experimenting digitally with my photos. I blended one of the background overlays, papers and my photo. Then used the same photo in a frame. I tried to keep the rest of the layout simple since there's much going on here. 
It feels good to get some digital experimenting done!

Club Scrap Celebrate Digital Collection. 

Saturday, January 23, 2016

Fall in Love

Tuesday Morning Sketch's new challenge is perfect for my doily crafting!  I found these beauties hiding at the bottom of my tag drawer. I've been playing with cirlces this month if you haven't noticed a pattern.  More circles to come so stay tuned for Wednesday's Blog Hog. 

Club Scrap papers, stamp and ribbon. Stickles. Sizzix heart dies in cork. Darice embossing folder.


Friday, January 22, 2016

Circle Artist Challenge

Welcome to the Club Scrap artist team challenge!  Thanks for joining us today.  If you've arrived here from Donna's blog you're in the right spot.  If you'd like to start from the beginning please wander over to Club Scrap to see what Karen's created for you. 

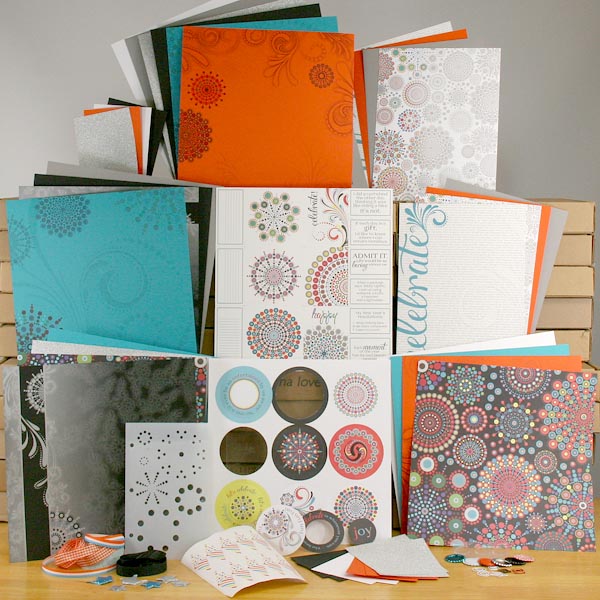
Can you believe we're celebrating Club Scrap's 200th collection? It's amazing to me to think of all the talent, creativity and patience it takes to come up with 200 kits. Blows my mind!  I have a hard enough time thinking of 3 kit ideas for Karen at the end of the year!

Today we're sharing our creations using the Celebrate kit and circles.  I like to challenge myself and use tools I've purchase and haven't seen in awhile (blushing). So here I dusted off the Martha Stewart circle cutter. After many mistakes I learned to tape down my paper to keep it from shifting during the cutting process. 


I found a silly picture of my dad from New Years Eve 2000 and thought how wonderful this photo coordinates with the colors and sayings from the Celebrate kit. I don't usually scrap one photo pages on paper but it's the only photo I have.

To create the background I started out by taping off areas of the stencil I wanted to use and spritzing white acrylic paint mixed with water over the stencil. I also covered up areas of the paper that was still exposed after placement of the stencil.  I repeated that several times, then added a few extra spritz to cover up some mistakes. 

Using the circle cutter, tags and several circle punches I added more circles to create a vertical line and tie in my photo.

Club Scrap papers, stencil, bottle cap and tags.  Darice and BoBunny jewels. Tim Holtz and Sizzix dies. 

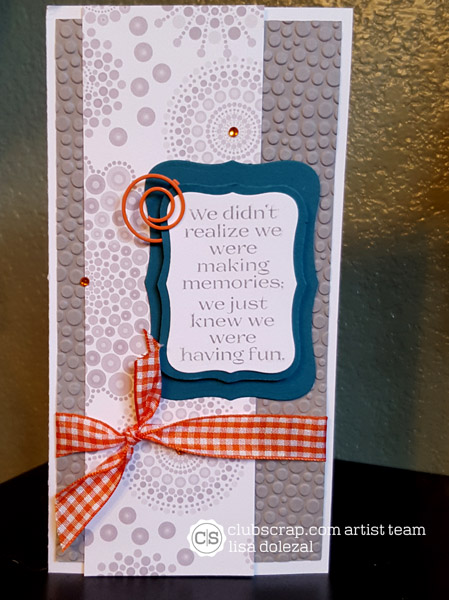
I also have a few cards to share with you...as you can see...I like circles. When Celebrate arrived and I saw the circle embellishments, this sort of card popped into my mind. It's a 5x5 gate fold card with an interlocking opening.
  • I took a 10x5 piece of cardstock and scored the sheet at 2.5 inches from each horizontal side. 
  • Cut a large circle out using a Spellbinder die and using the handy dandy Martha Stewart circle cutter, cut out the center of the black fancy circle. 
  • Adhere to one half side of the card using care to only apply adhesive to the left side of the circle.
  • Stamp the circles in different colors and fussy cut. Adhere on top of each other using dimensional adhesive squares.
  • Add embellishments such as Dazzle stickers, Stickles and jewels. 
  • Adhere circle grouping to half of right panel.  Here I closed the card so that the circle would line up inside the black cut out portion.


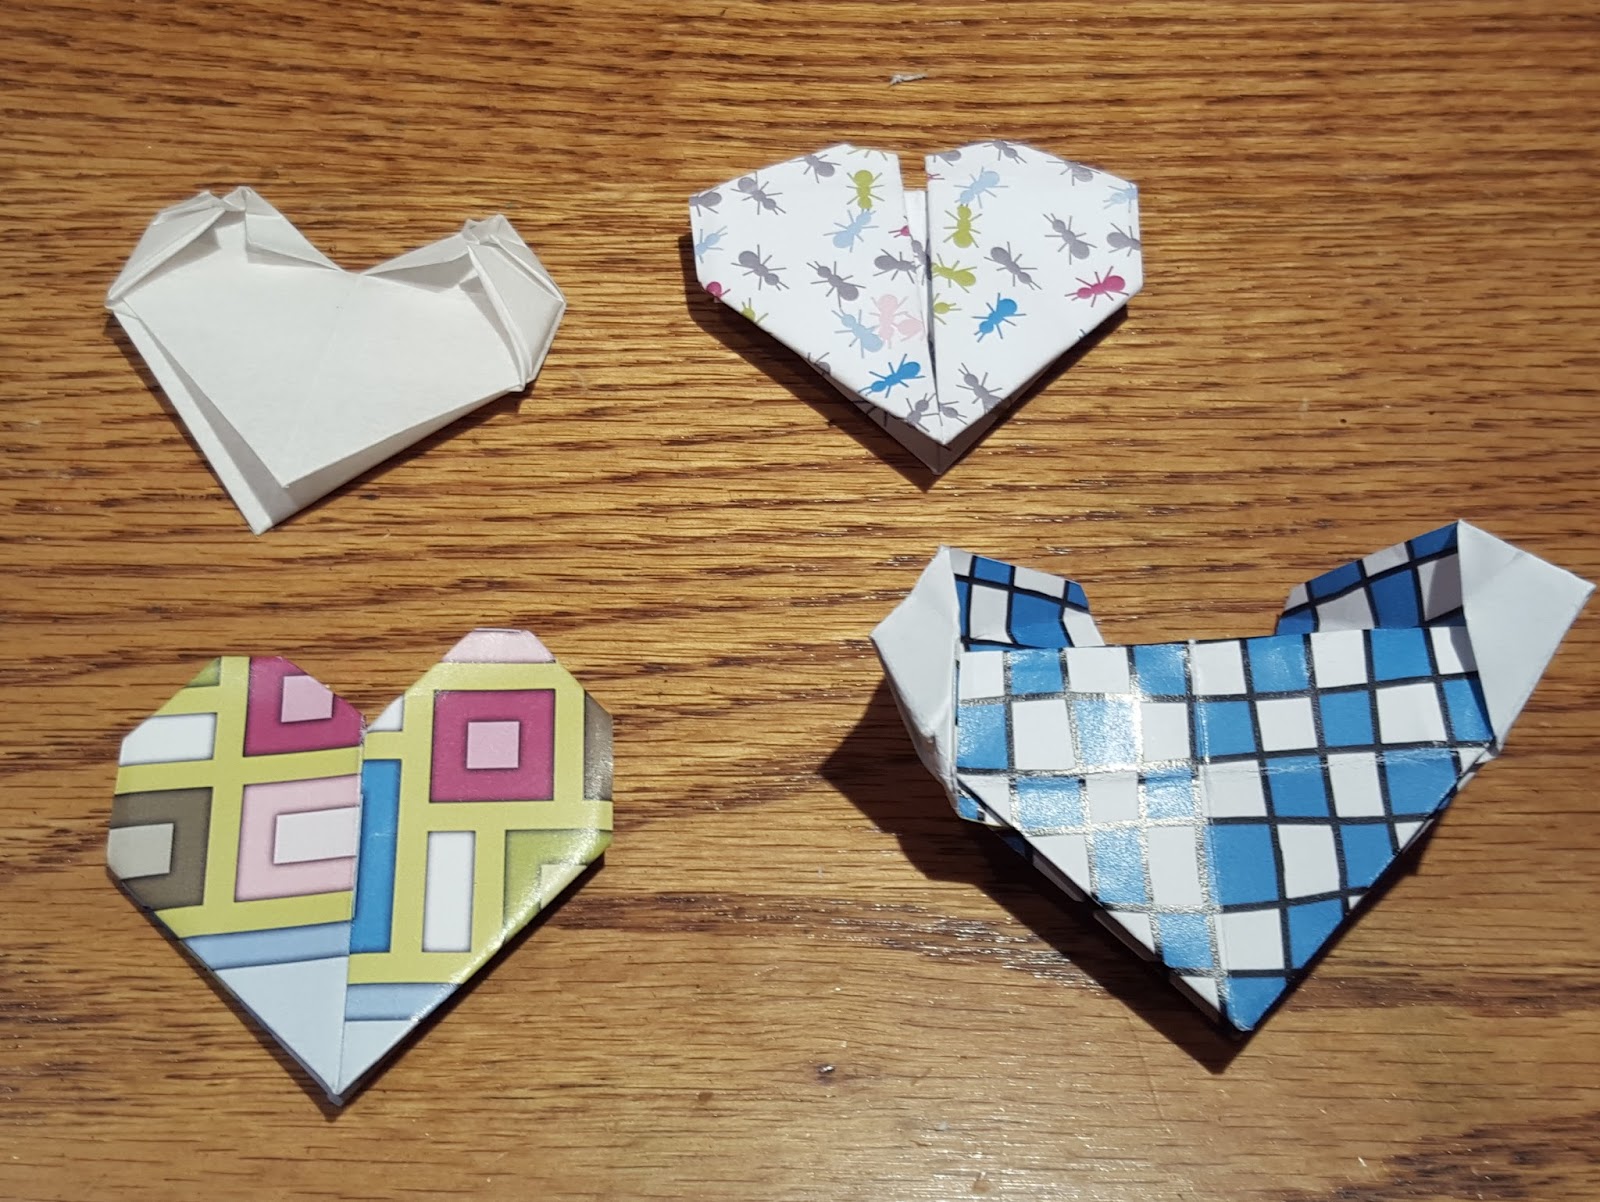
The next two cards are super easy peasy and use part of the Greetings to Go kit for Celebrate. 


Thanks for joining me today for the blog hop.  Please continue on to see what Roni has created for you. 
Have a wonderful weekend!


Thursday, January 21, 2016

Black and White

Can You Case It is celebrating their 3rd birthday with a black and white challenge. After checking out the design team's creations I was inspired to use my Club Scrap Stamping Star from retreat.  I haven't had a chance to use this bad boy yet and had a rainy day to play.

 
Jac taught us a different way to stamp this image. Keep the stamp face up, apply ink and then place the paper down on the stamp and rub. I thought she was nuts but it worked so much better than normal stamping. No smearing or skipped stamping.
 
I stamped four circle images and cut out sections.  Using dimensional adhesive, I stacked the circles in reverse with the outside being the largest ring.

Club Scrap papers, stamps. Unknown jewel.


Thank you to Can You Case It for last week's Design Team Pick of my Mirror Image entry!


Wednesday, January 20, 2016

Boring Without Me

"Admit it. Life would be boring without me."  I say that to my husband all the time with which he replies: "Yes, Dear." So when Club Scrap came out with this quote in the stamp collection, I couldn't wait to make a card with it! It's hardly your traditional Valentine's Day card, but he'll get a good chuckle out of it. 

I've been having a blast creating cards with the plastic film in the Greetings to Go kit. I started out a little conservative (see previous post) with the plastic and worked my way to stamping on the film with StazOn ink. Slippery little devils when you start adding ink so work slow and steady. 

The next two weeks Love to Scrap! Challenge Blog is hosting an Anything Goes challenge. Here I stamped on the film before sandwiching it in the panels. Added some jewels and ribbon to give the card dimension. A little washi tape and we've got the perfect set of colors.

Club Scrap papers, ribbon, stamps and washi tape. Queen&Co. jewels.

Tuesday, January 19, 2016

Love Winter!

You had to know that this challenge would get my attention...Winter! My favorite season.  CAS on Sunday's challenge is to create a clean and simple card with a winter theme. I got to use my snowflake border punch for the first time! I die cut snowflakes out of white burlap, added silver embossing ink to give it some shine and topped them off with snowflake jeweled buttons. 

Club Scrap papers and stamp. Martha Stewart border punch. Unknown buttons.


Sunday, January 17, 2016

Tuesday Morning Sketch

Welcome to the Tuesday Morning Sketch #334 challenge!  This challenge not only gave me an opportunity to finish up with my Celebrate Greetings to Go but reminded me that I actually have that exact Spellbinder die.  I don't use those dies as much as I should. I don't actually like the way they layer on each other.  The margins are too wide for my taste.  I actually ended up double matting the quote and hand trimming the mats. 

Club Scrap papers, stamp, ribbon and clip. Spellbinders die. Cuttlebug embossing folder.


Saturday, January 16, 2016

Color Throwdown #375

Color Throwdown's weekly color challenge almost matches the new Club Scrap Celebrate kit!  I couldn't help but to smile at these colors.  They're warm and inviting.

Here I kept the card simple and clean.
Club Scrap papers, ribbon and stamps. Prima flowers. Queen&Co. pearls. 

Friday, January 15, 2016

Cupcake Inspiration #342

I absolutely love the Club Scrap Celebrate's clear plastic film cards that come in this month's card kit. It took me out of my comfort zone a bit in stamping on the plastic (will show that soon).  The stamp becomes quite slippery and has tendency to slide a bit. You also need to use an ink that will dry on plastic.   


I created this card with the Cupcake Inspiration #342 in mind.  I took inspiration not just with the colors but with the frill edging of the cupcake wrapper. Yes...I'm STILL working on Valentine's cards :) After looking at the photograph of the card...I kinda wished I had lightly stamped a background image on the flaps.

Club Scrap papers, stamps. Stickles, Martha Stewart edge punch and ribbon.


Fenway

I'm still working on challenges, glad you're still hanging in there.  This layout is for the Scrapbooking.com 2 Page Sketch Challenge. When I saw the circles, I immediately thought of baseballs.  I've been wanting to play with my new (on clearance) sports Cricut cartridge. I love the center positions title.  


Club Scrap papers and stamps. Cricut sports cartridge. Reminisce sticker. Making Memories rub-ons.

Thursday, January 14, 2016

Mirror Image Stamping

I've been cleaning out my craft studio in anticipations of having to move EVERYTHING out. Yep...changing out the carpet for hardwood.  Kinda scared about that considering I drop an ink pad weekly.
 
So when cleaning out some drawers I came across this mirror image stamp by Rubber Stampede. 


Now I've tried this stamp pad before without much success.  I think I used the wrong ink and I reinked the stamp after stamping the pad. So I practiced and practiced to see what worked. I found that Club Scrap hybrid ink works best without reinking the stamp. Here's what I did to achieve the heart image with the swirl stamps from Club Scrap.
  • Apply ink to stamp.
  • Stamp on mirror image stamp pad.
  •  Stamp mirror image onto paper.

  • Stamp original stamp without reinking next to 1st stamped image.

Now, I had problems with the swirl stamps lining up since there is a little bit of an angle with the swirls. I ended up having quite a few swirl heart mats because only ONCE did I actually stamp it correctly.

So what did I do with all those heart images?  Here's a sample for a Valentine's day card that I made many duplicates of for the Can You Case It challenge.


Club Scrap papers, flourish stamp, tag, ribbon and jewels. 7Gypsies cardstock sticker. Rubber Stampede mirror stamp pad.


Wednesday, January 13, 2016

Origami Hearts

Karen over at Club Scrap is challenging us to use origami in our layouts, cards and projects. She lists several links to former blog postings if you need some ideas. I chose to do a heart origami to go along with my Valentine's cards.

Let me start off by saying...this takes practice. I started with a text weight paper, moved to vellum and then cardstock.  I found that folds had to be precise and if you burnish with a bone folder, it was easier to deal with when folds became tiny. I may have uttered some naughty words in creating these hearts...

Heart rejects

HOWEVER...the end result once you get it down is rewarding!  Love this little guy!
 
Club Scrap papers, tags and ribbon. Prima flowers. Stickles. Unknown sentiment.
 
I also did double duty when creating this card.  I used the sketch from Mojo Monday's 430 Sketch with a little bit of a twist to make it my own.


Tuesday, January 12, 2016

Retro Sketch #197


Good morning!  I spent some great quality time in my scrap room yesterday.  I was totally energized and my room looks like it.
 
It's no secret that I love sketches.  Having a sketch takes away the pressure to create a design.  They allow more freedom in crafting your creation.  So let's give Retro Sketch #197 a try.  It seemed pretty intricate to me when I first looked at so, but the design team samples really made it easier to understand.

 
My Club Scrap Celebration kit has arrived and I've been having a blast playing with the stamps and tags.  I can't wait to start creating with the plastic film! All the elements from this card are included in the deluxe kit and Greetings to Go. If you look closely at a corner on a Celebrate ALSB page, you'll see this looks very similar.... 


Monday, January 11, 2016

Less is More Flourishes

I know...two posts in one day!  I couldn't help it!  I was having too much fun in my craft room not to share this one ASAP.  I kept looking at the new stamps from Club Scrap's Celebration kit and was thinking they look like half of hearts. 


Some of that thinking could be that I've been thinking about Valentines cards.  I have a mirror image stamp pad that I haven't had much success with so I thought I'd break it out and OWN IT! After a few practice runs, I think I got it down.  I'll leave the process for another blog soon...I promise.
 
So...back to Less is More's Flourish challenge.  What I really like about this challenge is the "one layer" concept.  Too many challenges have elaborate cards that I think...how in the heck do you mail that?!  One layer...that is it.  You have to be able to ROCK that stamp image because you can't add a flower or embellishment over your stamping mistakes.  I admit it was hard not to add a ribbon or jewels or brads, however I LOVE the end result!
 
Club Scrap stamps and papers.