Showing posts with label Delft. Show all posts

Thursday, February 22, 2018

Hello Fusion

Fusion Card's recent challenge found me using new and old products.  I found a stack of Gelli plate tags I created last year that match perfectly with the card bases I had out on my desk. At the last scrapbook expo I came across this mini alphabet die by Elizabeth Craft Designs and haven't had a chance to use it yet.  The letters fit perfectly on the ribbon.
Club Scrap papers. Gelli plate. Acrylic paints. Elizabeth Craft Design dies. Bo Bunny pearls.

Friday, April 14, 2017

Excited about Friday

Happy Friday! 
I'm so happy it's Friday, I get my hair cut today! Thank goodness. 
Nothing makes a girl feel better than a haircut!
 
I just can't help but share more Delft cards with you. 
The colors just make me so happy! 
Here's a card using more of the faux tiles. 

Club Scrap papers and stamps. Lawn Fawn and Elizabeth Craft Design dies. Darice embossing folder. Recycled home décor flower. 


Thursday, April 13, 2017

Cupcake Inspirations #402

I just love the colors in this week's Cupcake Inspiration #402.  They're bright, cheery and perfect right before Easter. I used a left over panel I stamped from the Delft collection. I'm on an embossing kick lately.  I just love the look of white heat embossing on darker cardstocks.


Thursday, April 6, 2017

Wooden Shoes

I love puns!  This "Wooden Shoe" pun makes me smile every time I stamped it. 
I adore shoes. So I usually have to have any shoe image and  quote stamp.

I stamped the shoes on a wood veneer paper. 

I can't wait to use these with my other shoe related stamps and dies!


Wednesday, March 29, 2017

Delft Blog Hop

Welcome to the Delft Blog Hop brought to you by Club Scrap.  Each month the talented Club Scrap owner, employees and members present a project, card or layout using the monthly featured collection. The  purpose of the blog hop is to demonstrate the beauty of paper and digital crafts.

If you just happened on the blog hop today because you're a regular reader of my blog, and you'd like to view the entire hop, you can start back at Club Scrap. If you're already hopping and linked to me from Tina's Blog, you're in the right spot.

Each member of the team is pulling inspiration from the Delft Collection. The vibrant blues and gorgeous pop of yellow of this collection honor the still-popular art style made famous by the Dutch known as Delft.

I thought it would be kinda cool to make my own tiles.  Rummaging through my stash I found these chicken tiles.  I'm never going to use these as is. However, turn them over and I have a blank canvas!

I stamped the tile with an image in Sapphire blue and then used the crackle image in Ash.  Let dry overnight. LOVE LOVE LOVE!
I decided to get a little adventurous and use the frame stamp for my title. I used the font stamps from Cruisin' on the inside. Now, there is NO WAY I would have attempted this without my Misti. I fell in love with this framed stamp and it's my new favorite.
 I colored in the flowers with a light blue Copic and added drops of Nuvo.
 
The colors of this kit work perfectly with photos from a trip to Disneyland!
I wanted to give a quick shout out to these gel pens. 
 AMAZING! I'm kind of a pen snob and I love the fine tip and how smooth these pens write. 
 

Thank you for hopping with us today! Please continue on to see what amazing project Donna has created for you!


Friday, March 24, 2017

Delft Digital on Paper

Welcome to the March Artist Team Blog Hop brought to you by Club Scrap. Each month the team presents a themed challenge or technique. The  purpose of the blog hop is to demonstrate the beauty of paper and digital crafts. 

If you just happened on the blog hop today because you're a regular reader of my blog, and you'd like to view the entire hop, you can start back at Club Scrap. If you're already hopping and linked to me from Donna's Blog, you're in the right spot.

Each member of the team is pulling inspiration from the Delft Digital Collection.  We're here to show you how to utilize your digital scrapbooking supplies and maybe even mix some digital with your paper crafting. I generally only use my digital supplies for digital artistry so this challenge stumped me a bit. When I receive a digital kit, I look at the papers and decide how to turn them into overlays.  I look at the tags and turn them into blank tags or "steal" an image from the tag to make it something else.  I really love Jac's digital coloring and although we receive the same black image, I tend to snag these. I'll show you how I alter things.
 
Open the file, select the tag you're going to use with the marquee tool and copy/paste it to a new file.
 
I wanted to use this tag for an alphabet title so I needed to get rid of the lines.
  I wanted to keep the background visible (very slight) so I chose to use the clone stamp instead of just brushing over the lines.
Here's the two tags side by side for comparison.

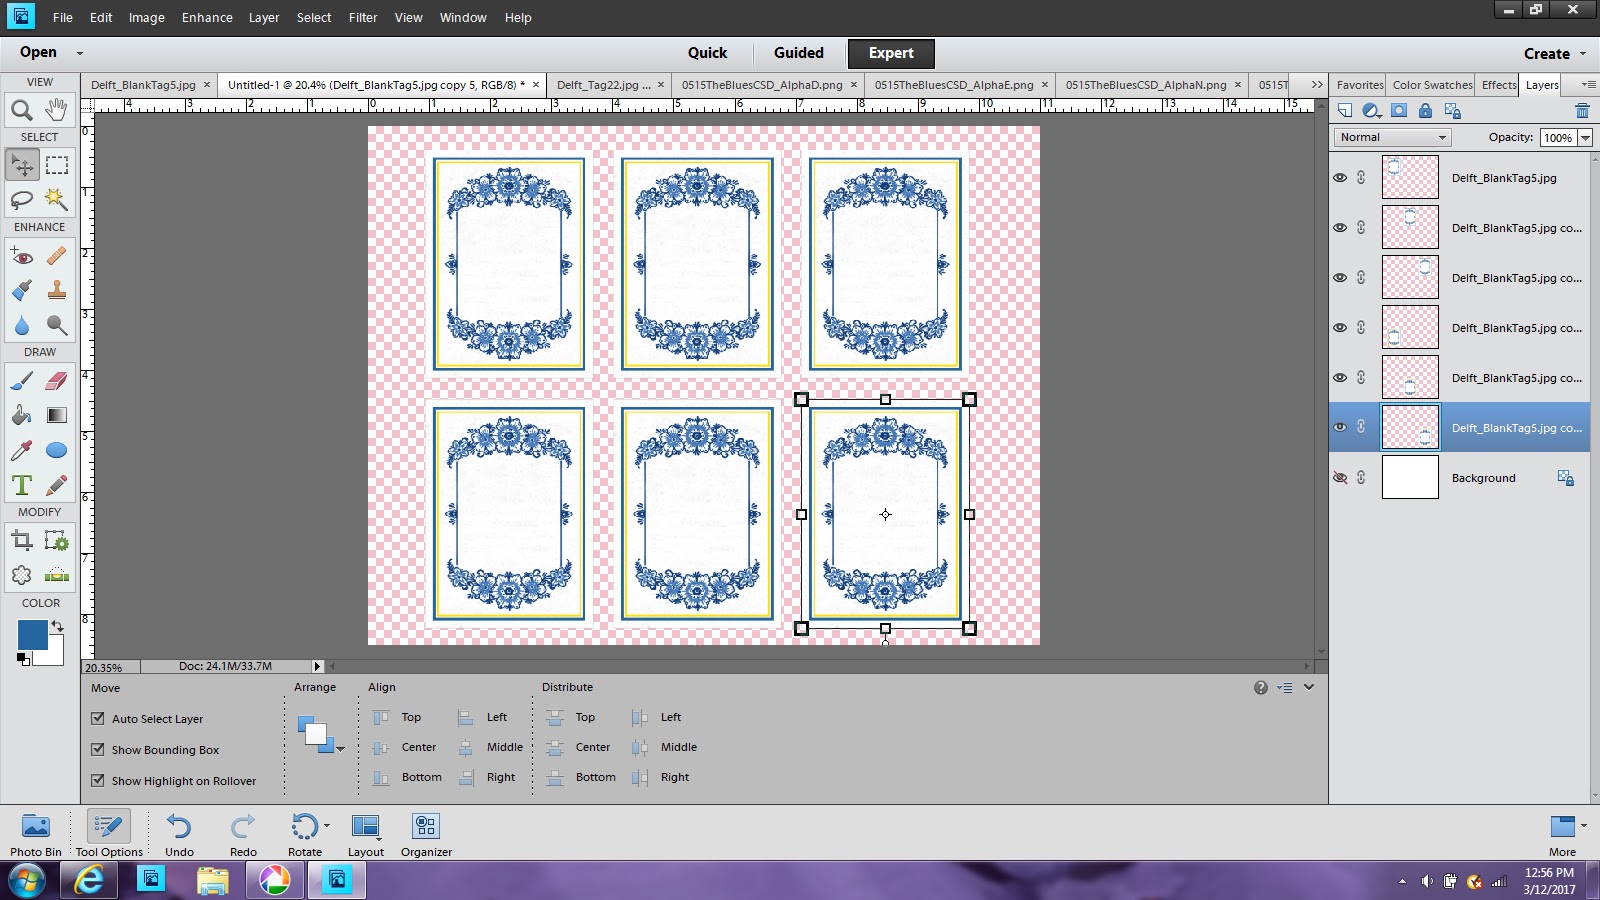
Now that I have my blank tag I duplicated it 5 times for my title. Lined up the edges for easier cutting.
Next I added the letters of my title to each tag. Making sure to center each letter within the tag.
Save as a .jpg file and print. See how the edges line up?  This is huge when trying to trim these out.
 
Next I wanted to create some flair. 
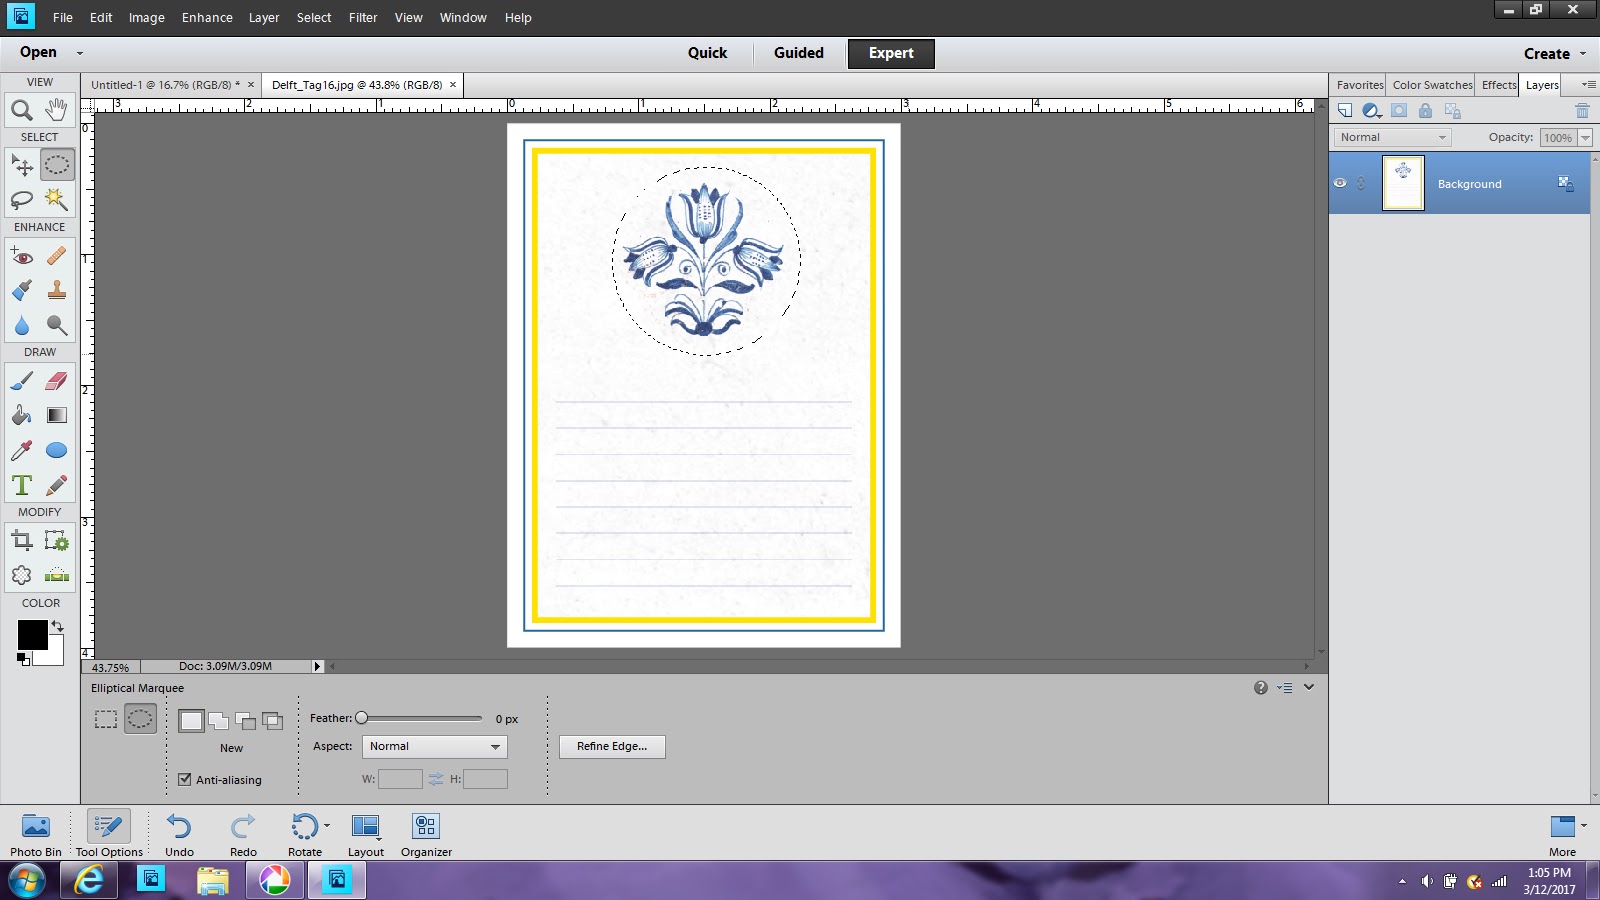
I really like the colored image on this tag so I selected the tulips with my elliptical marquee, right click and select "layer via cut".
This will open up your selection in a new layer. I then delete the background layer.
Simply add a stroke outline.  Here's your flair.  You could go even further and make it appear like an epoxy or a sticker.
I created a new 8.5x11 document and added six flairs (this allows for mistakes on my part).
I then added a few of the papers from the digital collection to make a full sheet and printed. 
 
 
Wondering what I'm going to do with those papers?
Probably not what you think I am. 
I'm going to turn those into washi tape!
 
Take your printed paper and add stripes of scotch tape to the papers, leaving a little tab so you can pull it off. Burnish with a bone folder for good contact.
 Now quickly pull off the tape.  Not all the paper comes up giving it a transparent look. 
 So let's put it all together.
 I added Nuvo crystal drops to the top and bottom flowers of the tiles.
 
Thanks for sticking in there today through the lengthy post!
I hope you've learned a few ways to stretch your digital stash.
  Please continue on to see what amazing project Tina has created for you.

Thursday, March 23, 2017

Sara Binders

A few months back I bought several Sara Binders and inserts that were on clearance. I love binders and planners.  It's almost an obsession. I absolutely love that I can decorate these however I choose for any occasion.
 
Start with a blank binder and rub Sapphire ink on the outside and inside edges.


Trim papers to fit on front, back, spine and insides. Round corners.
Adhere with bookbinding glue.
 Decorate as desired.

I love these Cabochons and Silver dome settings.
 
The inside dividers I decorated with cut apart tags and border strips.
 

The dividers have pockets with flaps and without.
 
A handy dandy little binder that's going to make a great gift!

Wednesday, March 22, 2017

Venice Canals

How beautiful is the Delft Digital Collection?!  I love the broken porcelain look to the images! I immediately started pinning images on Pinterest.  I didn't even know Delft was a thing :) I've been having fun creating my own paper tiles with embossing ink and powders. 
 
March's Idea Deck Challenge is to use the 2 of Clubs from any of the five decks.  I actually chose the 8 1/2 x 11 formatted sketch and just converted it to 12x12. Much easier to do when it's digital. The blue skies and striped poles help coordinate the photos and papers. 
Yes...that is a journaling card.  I'm really trying to be better about that. 
This digital journaling card was much easier to use than I had imagined.

Friday, March 17, 2017

Just for Fun Birthdays

Just for Fun Rubber Stamps is celebrating birthdays this month and who wouldn't want to received this bright and happy card on their birthday?!
 
Club Scrap papers, ribbons and stamps. Recycled flower. Darice embossing folder. Unknown wood embellishment.


Thursday, March 16, 2017

Happy Easter

 I could swear we just had Christmas! Is it really Easter time already?!
 
Creative with Stamps is hosing an Easter challenge and the new Delft Collection has perfect colors.  
 If you'd like to see how I made the tiles you can view this Faux Tile blog post.

Club Scrap papers, thread and stamps. Recycled flower. Unknown wooden bird embellishment.


Wednesday, March 15, 2017

My Sierra

I don't like to journal.  It's really not my thing.  If I do journal it's usually just the facts.  Boring!  So I don't know why I purchased these digital journaling cards. Club Scrap is hosting a What Was I Thinking? challenge this month and this was the first thing that came to mind!
 
Here's a layout of my kitty Sierra who loves to sit in the sun in my scrap room and wait for something shiny to fall.

Club Scrap digital papers, flowers. JumpStart Designs template. Simply Tiffany Studios journaling cards.
 
Have a "What was I thinking?" paper or digital supply? Share with us in our challenge.

Tuesday, March 14, 2017

Faux Tiles

I have been having a blast creating tiles for the new Delft collection. I'm generally not a fan of the color blue, only because I wear blue for work...for the last 25+ years.  I however love this shade of blue especially with the pop of yellow. You'll be seeing yellow flowers on most of my projects this month. I actually used them around the house for décor and needed a change.  They ended up in my craft stash and am happy to report that they've all been recycled!
 
So to create the tiles I went waaaay back in my stash to use up some perforated pages that came in the Sunken Treasures 2001 collection. They are 8 1/2 x 5 1/2 and already perforated into small squares.

 I stamped the tile stamp repeatedly on the page making sure to go off the edges.
Slightly bend the paper on the perforations and ink the edges.
I got carried away with the bending and some rows came off. 
Ink paper with clear embossing ink, sprinkle Ultra Thick Embossing powder and heat set.

 
Here's just a few samples using the Delft Greetings to Go with the tiles.


Monday, March 13, 2017

Creating Backgrounds

The March Technique Challenge this month over at Club Scrap is to create your own backgrounds.  Tina shared so many different ways to create backgrounds that the topic was continued on for a second blog posting. If you'd like to share your own technique or expand on one shown, please link to the Technique Challenge Linky Party for a chance to win a Club Scrap gift certificate.

I started by taping down the cracked porcelain stencil to keep the paper from shifting. 

Next spread clear texture paste onto paper and stencil.
Remove stencil and sprinkle fairy dust (glitter). Let dry. 
Close up after drying.
Time to create beautiful works of art with your background!

Papers, stamps, stencil, ribbon and tags by Club Scrap. Ranger Texture paste.

This card was created using the Fusion Card's newest challenge: