Showing posts with label Color Bursts. Show all posts

Tuesday, February 11, 2020

Cupcake Inspirations #486

Cupcake Inspirations is hosting a color challenge using a combination of green, brown and white. I created this background by inking my stamp in a pool of water and Color Bursts and then stamping on watercolor paper. 

Club Scrap background stamps and papers. Lawn Fawn circle die. Taylored Expressions sentiment stamp and die. Thrift store turtle button. 


Thursday, June 6, 2019

You're Sweet

Happy Thursday, my crafty friends!  We're in the first week of June and it's already approaching 100 degrees here in Cali.  What a perfect time to make a few summer cards.  

Just for Fun stamp. Cuttlebug embossing folder. Lawn Fawn die cut title. Nuvo drops. Club Scrap papers. 

I found a color burst art orphan in my stash that would make a perfect background for ice cream sandwiches.  Stamp the yummy ice cream on the background panel and fussy cut.  I cut off the sticks and used wood grained paper for a more realistic look.  Add Nuvo to image dots for dimension.  Die cut title, adhere to embossed card panel and cover with glitter Nuvo drops for sparkle.  

Don't forget to join us in this month's stencil challenge! Link up your projects for a chance to win a gift certificate to the Just for Fun stamp store. 


Monday, May 20, 2019

I Heart You

Happy Monday! Paper Smooches Stamps is hosting a Flower Challenge for May. So today I'm featuring thePSS Hibiscus flower stamp  from the Get out of Town and Get out of Town Dies sets. Instead of coloring the image I decided to stamp on a Color Burst art panel and die cut. The background is created by simply spraying with Stipple Mists.

 Paper Smooches stamps and flower die. Elizabeth Craft heart die. Club Scrap papers and mists. Pretty Pink Posh sequins.


Tuesday, September 18, 2018

Briny Bon Voyage

Paper Smooches is hosting a Clean and Simple Challenge which always seems to be the most difficult challenge for me. I like to add "stuff" and white is generally not the color I create with. 

1. Die cut Color Burst art panel. Stamp sentiment. 
2. Stamp and die cut Briny Blue images. 
3. Add googly eyes for fun :) 


Thursday, August 30, 2018

Too Much of a Good Thing

I have packages of 4x6 photo paper that I just can't seem to let go. My new photo printer takes different paper and I'm unsure what to do with this paper.  That is until I saw this awesome coffee filter print tutorial by Splitcoast Stampers. By using coffee filters, color bursts and photo paper you can create some amazing backgrounds. 

To create this card I stamped several soon to be released flower images from Just for Fun Rubber Stamps in Staz-on ink on to the background panel and fussy cut. For the card front I stamped the same flower image several times and heat embossed with white embossing powder. 

Just for Fun flower and quote stamps. Club Scrap papers and jewel. 

Thursday, April 12, 2018

Be Different

Club Scrap is challenging its members to create their own Shibori artwork with tissue papers. This Japanese dye technique uses different folds and twists to create patterns on cloth. Today I'm playing with re-inkers and tissue paper. Julie gives a great tutorial on the Club Scrap blog.
 
Using the re-inkers I had on hand and folded tissue paper, I created these background Shibori panels. 
I then adhered the tissue to manila tags using bookbinding glue to make the panels more sturdy.
Time to create cards with the gorgeous panels.
 
This blue panel was created using Color Burst powders dissolved in alcohol.


If you'd like to join the challenge for a chance to win a Club Scrap gift certificate, enter your artwork via the Linky party on the website. 


Friday, September 1, 2017

Have a Little Bubbly

There are numerous monthly challenges over in the Club Scrap Forum that I like to participate in.  Sometimes I like to combine challenges and couldn't resist using up those Color Burst panels and scraps for some of August's challenges. The first challenge here is using the 3 of Hearts from the Card Making Idea Deck Vol. I.  If you missed out on the idea decks, there is only one still available in the Club Scrap store. I love using these decks for design ideas and cutting instructions. The rest is up for creative interpretation.

 Club Scrap papers and tag. Avery Elle stamp. Ken Oliver Color Bursts. Nuvo drops.
Club Scrap papers, ribbon and tag. Paper Smooches Stamps. Ken Oliver Color Bursts. Nuvo drops.
 Club Scrap papers, ribbon and stamp. Darice embossing folder.
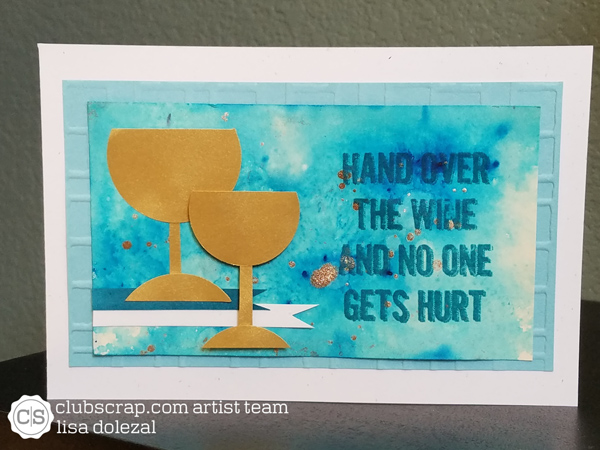
This card does double challenge duty and meets the requirements for the Tools & Stash challenge. This month we're to use punches. I created wine glasses with a circle punch. I found the tutorial on the wine glass on Pinterest. It's very simple.
 Punch out a circle. Cut off a small section, trim a 1/4"  section below that. Now arrange in a glass shape.  You can make them as big or small as you want.
 
I can't wait to see what challenges we're presented with for September.

Monday, August 28, 2017

Sorry Mermaids Only

Yes...I've returned to my Color Bursts panels.  I wanted to demonstrate another technique you can do with your color bursts. This one came about because I didn't like the panel when it was done but still wanted to use it. When I originally created the panel, I had used this anchor stencil spritzed with water and placed on a dry color burst panel.
It really didn't turn out like I had hoped. If you didn't know it was an anchor, you really didn't know what the image was.  So at this point, I stamped sea weed images and heat embossed with clear powder.
Next I used a wet paper towel and pulled off as much color as I could leaving the "trapped" embossed color behind. Now this I could do something with.
I love the distressed edges that watercolor paper gives!
Club Scrap papers, stamps, ribbon and charm. Ken Oliver Color Bursts. Nuvo Crystal drops.

Friday, August 18, 2017

Being a Mermaid

Have I mentioned lately how I love my Color Bursts?  Here's another background created with Color Bursts. I first created a background and let it dry. I then placed a stencil a stencil on top of the panel and sprayed water over it. I used a paper towel to pick up the color not covered with the stencil. 
The mermaid tail was a separate Color Burst panel that was stamped and cut.
 
Now for the opposite. I had a piece of white watercolor paper, layered a stencil on top and sprayed with water. I sprinkled Color bursts on top of the stencil and let the color bleed through.  I love the watercolor look to this!
 
Stamps and stencils by Club Scrap. Ken Oliver Color Bursts. Nuvo Crystal drops.

Thursday, August 10, 2017

Dream Higher

When I saw this baby fish stencil at my local scrapbook store I squealed with delight! I knew it would go perfectly with the new Lagoon collection by Club Scrap. These little fishes are just adorable!
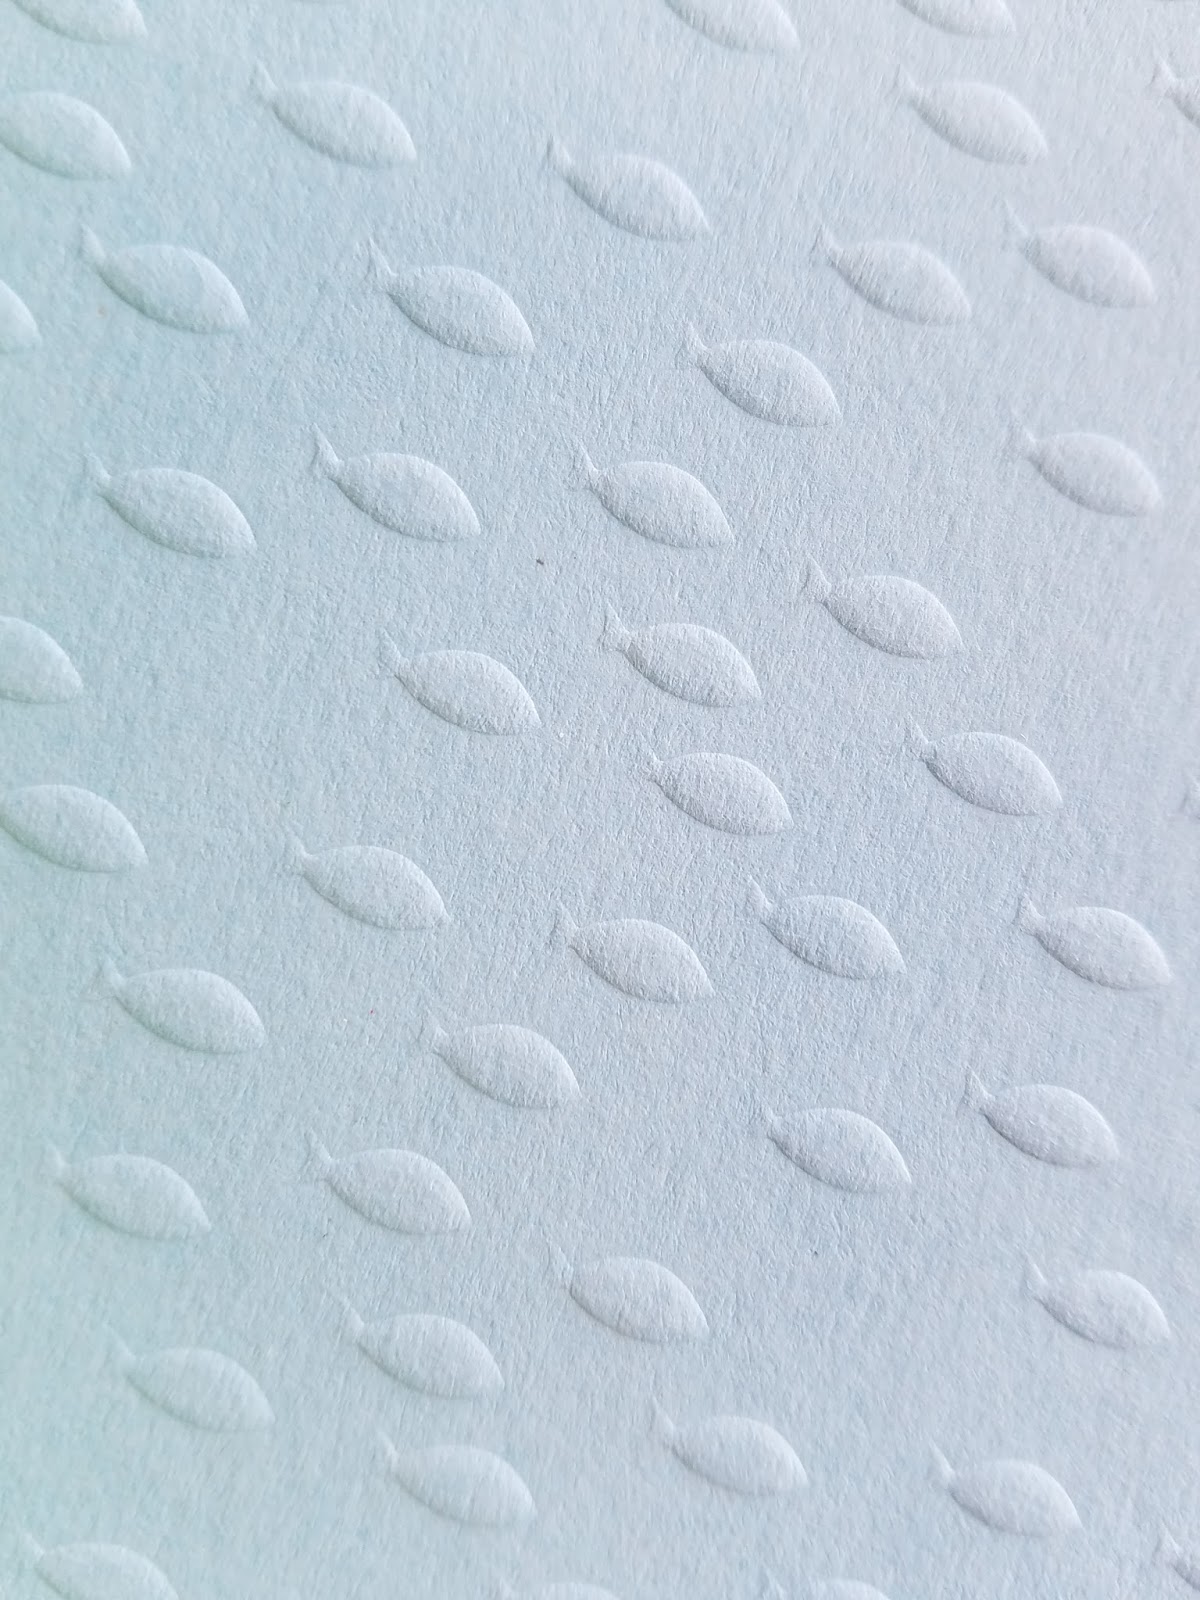
When I started creating this card I didn't want to stencil the fish but add dimension so I used the stencil as an embossing plate.

1. Place two rubber pads down on a one clear plate. 
2. Place your paper down on the rubber pads.
3. Layer the stencil on top of your paper.
4. Top with the second clear plate and run through your machine.

Here's the close up of the embossed mat. 
To create this card for the Fusion Card Challenge I used a Color Burst panel I created last week and the newly embossed mat. I sure do have to say...I missed my Color Bursts. I added a few Nuvo crystal drops to continue the water theme.
Club Scrap papers, stamp, twine and charm. Ken Oliver Color Bursts. Echo Park stencil. Tonic Crystal Nuvo drops. Spellbinders die.


Tuesday, August 8, 2017

Mermaid Wisdom

With all the sensation the Distress Oxide inks are creating I wanted to revisit my Color Bursts. They act similar with water even though they are two different products. Embarrassingly to say...I have every color available for both the Color Bursts and the Distress Oxides.

So let's do a recap on my favorite way to use the Color Bursts.
1. Spray watercolor paper with water.
2. Sprinkle on your colors of choice. Remember these will blend and turn muddy if not careful.

3. Add more water if needed.
4. Dry with a heat gun.
5. Add metallic if desired and dry.
6. Add drips of water and dry.
Now, time to start making something with these panels. This month's NBUS (Never Before Used Stuff) challenge is use stamps and stencils with a sea theme. Well isn't that handy since this month's collection is Lagoon. Here I combined embossed mermaid images and quote from Lagoon and the coral image from Seaside.
Check out how awesome the Nuvo Crystal drops look on the Color Burst panel.

I created tons of panels so you'll be seeing these throughout the month. Here are more fun instructions on using your Color Bursts.
 
P.S.  Don't panic...this does come off!


Tuesday, June 20, 2017

Colored Texture Paste

June's technique challenge brought to you by Club Scrap is to add texture to your project with pastes.  I just happened to have this mini jar of transparent paste that I didn't know what to do with.  I didn't want a translucent image so I mixed color bursts with it in hopes of it not coming out translucent. The color was a perfect match with this month's Pattern Play collection.  The paste looked fantastic on the white cardstock but disappointing on the darker backgrounds.
 
 
Club Scrap papers, stamp and stencil. Nuvo crystal drops. 
It was difficult to get a photo. Sorry for the glare. 
Now it's your turn to create with texture paste. Be sure to add your work to the Linky Party for a chance to win a Club Scrap gift certificate. 


Wednesday, May 24, 2017

Paper Smooches Flowers

Last month I created several art panels on photo paper using Color Bursts.  I decided to use up some of those amazing panels for Paper Smooches flower challenge. I don't have many Paper Smooches stamps or dies with flowers so I made do. This first card I used the rose from the Hope stamp set, colored with pencils and Wink of Stella. I also die cut "Hope" on craft foam for dimension.  So in love with this card! 
 
Paper Smooches sentiment, rose and die. Wink of Stella. Ken Oliver's Color Bursts. Club Scrap papers, background stamp.
 
 
Enjoy life's flower is made with Paper Smooches heart balloon die. I just stacked the balloons in a circle and curled the "petals". Add a cute little button for the center. 
Paper Smooches die and stamp. Club Scrap papers, background stamp, jewels and button.
 
 
A simple card with a simple tag with so much oomph. I'm always saying "OMG" so this Paper Smooches stamp from the Slang Gang always make me giggle. 
Paper Smooches stamps. Ken Oliver's Color Bursts. Club Scrap papers, tag, ribbon and jewels.


Thursday, April 27, 2017

Cherry Blossom Color Bursts

It feels like forever since I've played with my Color Bursts.  I have stacks of 4x6 photo paper left over from a now defunct printer and wanted to experiment with them...it's either that or donate them. So I dusted off my pink and silver Color Bursts and got to work. I chose the ice pattern stamp from Shades of Winter to create my backgrounds.
 
1. Brush water onto glossy photo paper.  
2. Sprinkle pink Color Bursts on paper. 
3. Add more water to make messy. Add metallic Color Bursts.
4. Using this panel as an ink pad, stamp into Color Bursts.
5. Stamp onto a second blank panel.
6. Repeat the process until happy with the background.
7. Let dry. I actually used a matte spray to keep metallic colors from rubbing off.
What I learned from the photo paper is that the color bursts dry very fast and the stamped images are fairly clear.  The paper doesn't absorb the inks and water like normal cardstock.  As you can see in the background I had a hard time getting the water and colors to move.  The metallics tend to rub off and require a fixative. However, I'm very pleased with the results.
 
Club Scrap papers, stamps, ribbon and flower. Making Memories rub on. Cuttlebug embossing folder. Queen & Co. pearl. Ken Oliver Color Bursts.