Wednesday, November 23, 2016

Retreat Pocket Planner

I'm totally into making small albums and journals for gifts right now. We take so many photos with our phones but no one is printing them out anymore. There is so much heartache when a phone is lost, computers crash or some other electronic catastrophe.
 
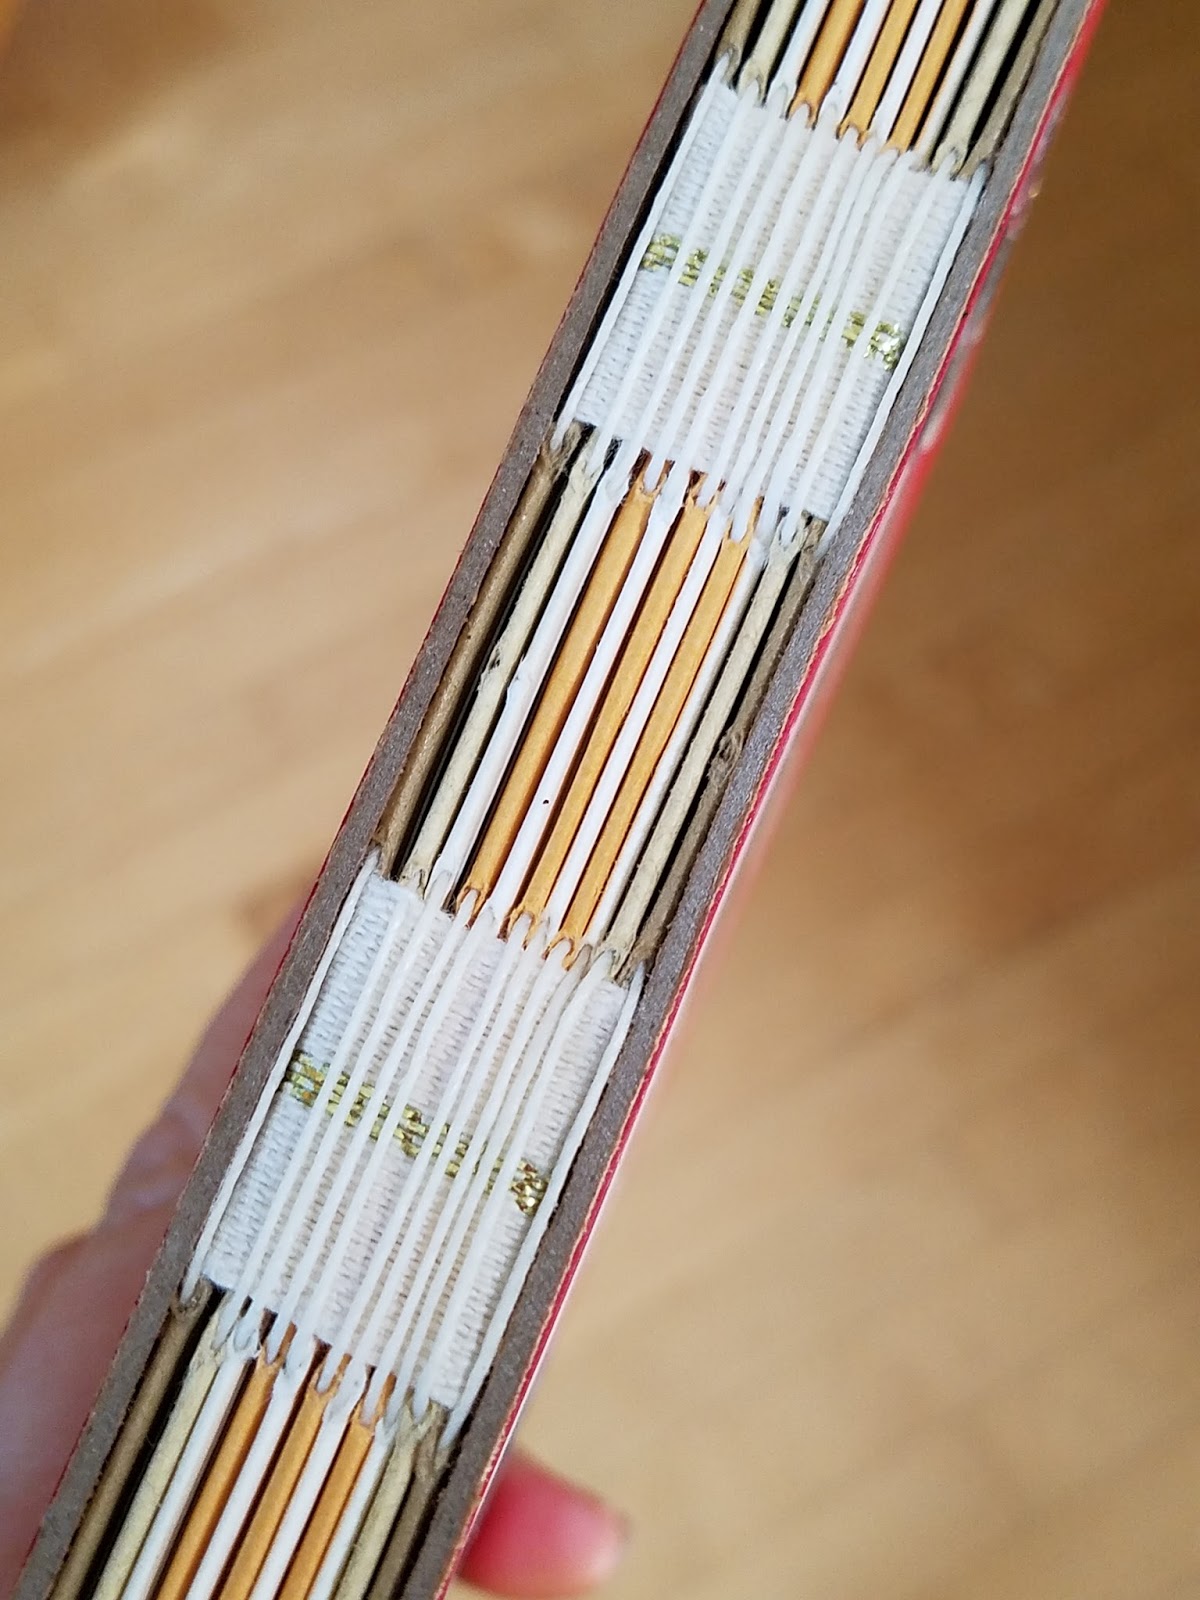
I made this pocket planner/album that came in the Literature deluxe kit for my dear friend Tracey for her 39th birthday ;-). I filled it with pictures from retreat, our short road trips throughout the week and some fun quotes. The pockets and enclosed pages will let her keep ticket stubs and small mementos from our trip.

 
 The gorgeous stitching and binding.
 
 
A glimpse inside...


Sometimes I don't want to part with these great mini albums but I get so much joy from giving them!
 

Tuesday, November 22, 2016

Disney Paradise

Hey...I think this is the first layout I've shared using the Paradise collection. I've been using it for projects and cards but decided the colors went great with my recent Disney photos. I was super excited to break out my coveted Disney washi tape!

Club Scrap papers. American Craft Thickers. Bo Bunny brads. Queen&Co. washi tape. Memorabilia.
 
This layout was created for the November Layout Sketch challenge.

Monday, November 21, 2016

Venice

I did it! I finished the Europe Album! I saved the best for last. Venice was my all time favorite destination in Europe. I just couldn't get over the canals, food and wine. So glad we took the extra time to make our way there. The European Train experience was quite the adventure!
 
Club Scrap papers, brads, ALSB instructions and stamps. Thicker letters. Memorabilia from trip.
 

Friday, November 18, 2016

Chalk Painting

Welcome to the Club Scrap Artist Team Blog Hop! This month we've been challenged with using the Enchanted Forest unmounted stamp sheet, Girlfriends unmounted stamp sheet, and the Sunflowers Sparkle Stickers.
 
Join us on the hop to see what this talented team has created with these supplies.  If you've arrived here from the very crafty Donna,  you're in the right spot. If you'd like to start at the beginning head over to Club Scrap and see what Karen has created for you.
 
When I first spotted the twig stamp from Girlfriends, I thought this would make a beautiful wreath. but when I finished stamping the "wreath" in a circular form I thought it looked more like a snowflake. The inside is quite messy so I did what I learned from Jac at retreat...cover it up with chalk paint!

 
Once I painted the chalk on the center I still didn't like it. I didn't know what to do with the center until I found some snowflake die cuts. I pulled the center gem off and replaced it with the larger sparkle sticker.  I then added a Wink of Stella to add shimmer and now I love it!
 
Club Scrap papers, gem and stamps. Wink of Stella. Dazzles stickers. K&Co. snowflake.


Since I had the chalk paint out, I might as well keep going. Here I placed a wide strip of washi tape on my card and painted chalk paint on the washi and swiping off onto the card. Removed the tape and use the open area for stamping.
 
 
This final card is really directly out of the Stamped Bouquet class Jac taught. I stamped the floral image in parchment pigment ink, painted chalk paint over some of the flowers and restamped in permanent black ink.
 
I used masks over the flowers I wanted to keep white while stamping in black.
 
 
As a thank you for joining us today, I have both sets of unmounted stamps available as a free giveaway.
I'll randomly choose two comments on Thanksgiving and contact the winners that following weekend.

Congratulations Wendy and Retta! You're the winners!
 
 
Please continue on to see what spectacular handmade project the fabulous Tina has created for you. 

Thursday, November 17, 2016

Handmade Paper with a Personal Touch

I received some beautiful flowers from my sister-in-law when they came for dinner recently. She was so proud of these flowers straight from their garden.  I wanted to save them and do something special with them.  So after searching Pinterest I decided to make handmade paper for Christmas gifts this year. I created ATC's last time I made paper with more in-depth instructions on that blog posting.

Blend junk mail envelopes with water.
 
 Pour pulp into a paper-making screen mold and add dried flowers on top.


Drain.


Dry paper. Press for 24 hours.
 
 
So I thought I'd share a few tricks and tips this time. Mostly what-not-to-dos.
 
 Don't use security envelopes, the ones with the ink on the inside of the envelope. They will give your paper a blue or grey tint.
Turn off the steam setting on your iron. Your paper will dry MUCH faster. Yep...did that.
Holiday envelopes with metallic insides are the best. They give your papers little metallic flecks that are beautiful! I actually bought a box of 20 cards just for the metallic lined envelopes. $2 at my local thrift store.
 
 
The backsides of the paper don't have leaves in them, making it perfect for letter writing.
I'll just score and fold these. I'll wrap them with a beautiful ribbon and add envelopes.


Wednesday, November 16, 2016

Barrel of Blessings

Recently I purchased a template package from PrelestnayaP Designs over at Pickleberrypop, which happens to be my new favorite digital store. I don't have any templates that use a block method like this so I thought I'd give it a try. I absolutely love the results! It was fun to challenge myself with so many paper choices and embellishments. Plus...I was forced to journal just to fill space.
 
This layout is from an awesome weekend where Tricia and Karen were in town for the Scrapbook Expo. We enjoyed some awesome food and wine while actually getting some work done too. I even discovered some really cool places in my hometown!

Club Scrap papers, flowers, ribbon, charms and stamps. PrelestnayaP Design Templates. 

Tuesday, November 15, 2016

Garden Holiday Cards

I was cleaning out my digital files and came across some templates that were neglected. I took one look at a 12x12 template from Marshmella Designs and knew this was what I wanted for my holiday cards.
 
 
I resized the template to 4x6 and did some minor adjustments to the design.  The new Christmas Thyme digi kit has wonderful colors and papers to work with. I'm embarrassed to say that I bought the paper kit, stamper's kit and the stamps that go with this gorgeous collection.  Out of control!
 
Club Scrap digital papers, flowers, tag and ribbon. Marshmella template.
 
Don't forget that you can download the digital kit, print from your own computer and make as many paper cards as you need. Karen shows you how to do just that in this blog post from June.

Check back on November 26th for the Christmas Thyme Blog Hop.